Struggling with a wobbly-sounding vinyl? It’s likely your turntable‘s tonearm needs a balance check. In this post, we’ll guide you through the steps to achieve that perfect harmony between needle and groove.
And trust us—it’s simpler than it sounds!
Key Takeaways
- To balance a turntable tonearm, start by turning off the turntable and placing it on a flat surface. Remove the needle cover and adjust the counterweight until the arm floats level.
- Use your cartridge’s manual to find the correct tracking force, then set this number on the counterweight scale to protect your records from damage.
- A properly balanced tonearm ensures smooth music play and extends record life. For more accuracy in setting weight, use a stylus force gauge.
- Remember that different types of tonearms, like straight, S-shaped, or J-shaped, require specific adjustments for ideal sound quality and performance.
- Adjusting turntable speed is also important for sound quality; use a strobe disc to ensure accurate speed and fine-tune as needed with pitch control.
Importance of Proper Tonearm Balance

Getting the tonearm balance right makes sure that your vinyl records play smoothly. If it’s off, even a little, your music won’t sound as good. The needle could skip or slide across the record because too much weight can scratch your favorite tunes beyond repair.
Too little force, and you’ll hear more hiss and fuzz than music coming from your speakers.
Think of balancing the tonearm like setting up a seesaw for perfect playtime; both sides must be equal. This keeps your turntable happy and helps every part work better together. Keep in mind that each type of tonearm—be it straight, S-shaped, or J-shaped—needs its own special touch to find that sweet spot where sound quality is top-notch and records stay safe.
Different Types of Tonearms

Before we delve into the nitty-gritty of tonearm balancing, let’s take a quick look at the various styles fluttering around turntable town. From the sleek straight-arm wonders to those classic S-curves and the retro charm of J-shaped models, each type boasts its own unique groove-riding characteristics that influence your setup—and ultimately, how sweet those vinyl beats will sound.
Straight Tonearm
Straight tonearms are common on many modern turntables. They’re designed to offer a direct path from the stylus to the pivot point. This design can help keep tracking errors low and minimize distortion in your music.
Each straight tonearm requires a specific weight, matched to the cartridge you’re using, for optimal performance. Check what your turntable’s manual says about setting up the correct tracking force.
Balancing a straight tonearm means adjusting until it floats evenly—not too heavy or light on either end. You’ll need to find that sweet spot where the needle rides the record’s groove just right, with enough pressure but without dragging down your tunes.
Use the counter-weight at the back of your arm to dial in this delicate balance; it’s crucial for keeping those vinyl spins sounding great and preventing any damage to your precious records.
S-Shaped Tonearm
An S-shaped tonearm is known for its elegant curves and aesthetic appeal. It’s a type found on many classic turntables, like the famous Technics SL-1200. DJs and audiophiles alike appreciate this style for its ability to minimize tracking errors.
The curved design helps ensure the cartridge stays perpendicular to the record groove, which can enhance sound quality.
Balancing an S-shaped tonearm involves careful adjustments, just like any other type of arm. Start by setting the horizontal balance, then adjust the tracking force according to your cartridge’s specifications.
Fine-tuning these settings prevents needle skips and protects your records from wear. With proper setup and maintenance, an S-shaped tonearm provides excellent performance that can last for years.
Next up is understanding how a J-shaped tonearm differs.
J-Shaped Tonearm
J-shaped tonearms stand out for their sleek design and great sound. They have a special curve that helps minimize tracking errors and distortion. This makes your music sound better because the needle follows the record’s grooves accurately.
DJs and vinyl lovers like J-shaped arms because they make records sound clearer by cutting down on resonance.
Setting up a J-shaped tonearm right is key to getting that top-notch audio performance. They allow more precise adjustments of tracking force and stylus alignment, leading to a smoother listening experience.
Their modern look adds style to any turntable setup, too. If you want your records to play beautifully, consider going for a J-shaped tonearm.
Now let’s focus on how exactly you can balance your tonearm for perfect play every time.
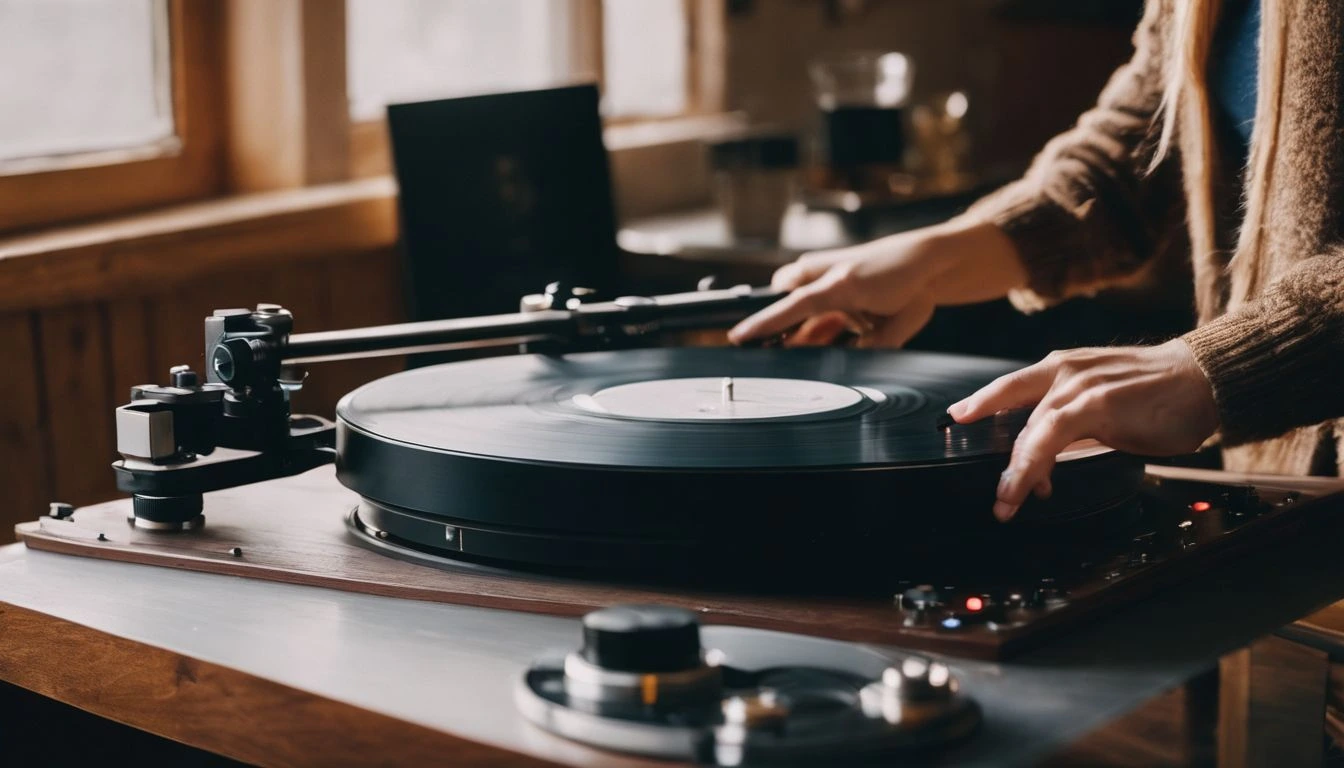
Step-by-Step Guide to Balancing Your Tonearm
Balancing your turntable’s tonearm keeps your records sounding great. Follow these steps to set the tracking force correctly and protect your vinyl.
- Start with the turntable turned off. Make sure it is on a flat surface.
- Remove the needle cover if there is one. You want to balance the tonearm with the needle exposed.
- Find the counterweight at the back of the tonearm. This round, movable piece adjusts the tonearm’s weight.
- Gently push forward on the counterweight until you feel it moving freely.
- Slowly turn the counterweight backward until the tonearm floats horizontally. It should be level and not touch anything.
- Locate the tracking force scale, often at the front of the counterweight.
- Without moving the whole counterweight, rotate just this scale to “0.” Now you have a zero balance point.
- Look up your cartridge’s recommended tracking force in its manual or online for accuracy.
- Turn just the counterweight (not the scale) to match this number, and set your weight.
- Use a stylus force gauge for more precision if you want an exact measurement.
- Carefully lower and raise your cueing lever to check that it moves smoothly without dragging or jumping.
- Adjusting plays a big role in sound quality and recording life, so take your time with each step.
Additional Considerations for Optimal Turntable Performance
Beyond the delicate dance of tonearm balancing, there’s a whole symphony of tweaks to fine-tune your turntable’s performance. Sure, you’ve mastered stability, but how about tempo? Cranking up the precision doesn’t stop here; adjusting the turntable speed is another trick to keep your records spinning harmoniously.
Stay tuned as we dive into that and more ways to hit all the right notes with your setup.
How to Adjust Turntable Speed?
Adjusting your turntable’s speed is key to crisp sound. A correct speed keeps the pitch of your music accurate.
- Locate the speed control on your turntable. It may be a knob, slider, or switch.
- Make sure the platter isn’t spinning before you start adjusting.
- Use a strobe disc to check the current speed. Place it on the platter, and turn on the strobe light.
- Watch how the pattern on the strobe disc moves. If it’s still, your turntable is at the right speed.
- If patterns move clockwise, your turntable is too fast. Counter-clockwise movement means it’s too slow.
- Adjust slowly, using the control. Turn or slide it slightly to change the speed.
- Keep checking with the strobe disc until patterns appear still under the light.
- Listen to a familiar song after adjustments. The pitch should sound just right now.
- Fine-tune if necessary, especially for DJs who need precise beats-per-minute (BPM).
- Always return controls to neutral if you switch between 33 and 45 RPM records to avoid damage.
Conclusion
Now you know how to keep your turntable’s tonearm in perfect harmony. Remember, take it slow and be gentle; your records will thank you. With the right balance, every note hits home just as it should.
Keep these tips in mind for a smooth sound and long-lasting vinyl life. Happy listening!
For further guidance on achieving the best audio quality from your turntable, discover how to properly adjust your turntable speed.
FAQs
What are the steps to balance a turntable tonearm?
First, make sure your turntable is on a flat surface. Then, gently move the tonearm lift so it’s up. Now, carefully adjust the weight until the arm floats level—like it’s zero gravity! Finally, set the tracking force as recommended for your cartridge alignment.
Why does proper tonearm balance matter for my records?
Once that balance is achieved, everything will run smoothly—or should I say spin? A well-balanced tonearm won’t skip and scratches less, keeping your vinyl in tip-top shape!
Can improper tonearm balancing affect audio quality?
Absolutely! If that tiny tonearm isn’t leveled correctly or if the cartridge alignment’s off, yeah! It can muffle your tunes or, worse, make them sound like they’re under water.
Do I need special tools to balance my turntable’s tonearm?
Usually not—you can often do it with just what comes with your player; maybe add a bit of patience into the mix too. But hey, getting everything aligned just right? That’ll make every note hit home when you drop that needle down!